How to adjust your spam settings via Plesk
How to adjust your spam settings via Plesk
Introduction
This is a quick step-by-step walkthrough for adjusting spam settings on a Reseller Hosting account, via the Plesk Onyx control panel.
STEP 1
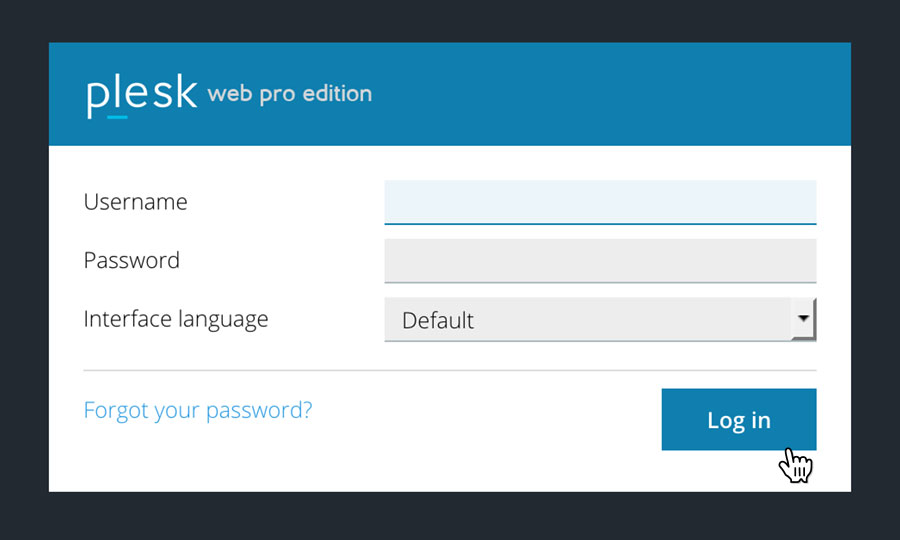
Login to your account
Firstly you’ll need to log in into your Plesk Onyx control panel, which will be at a URL similar to https://your_server_number.xenserve.com:8443/
STEP 2
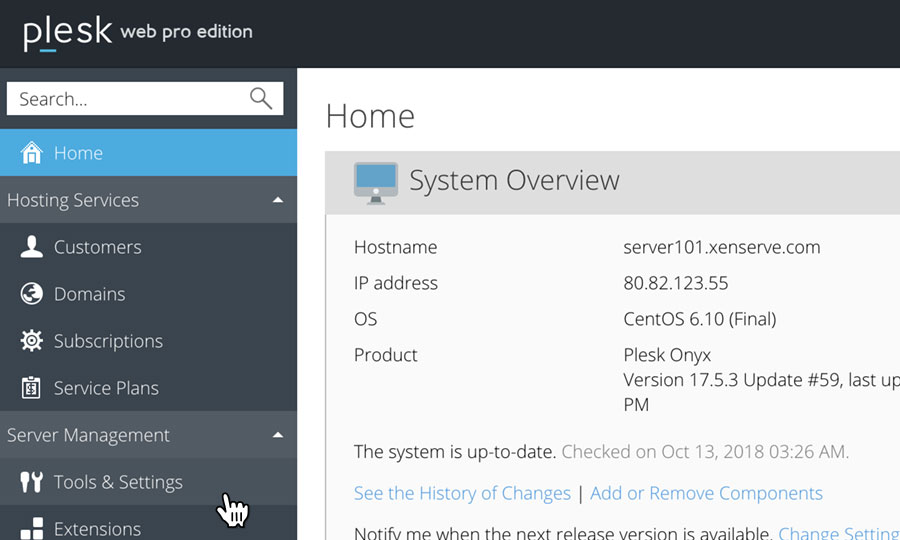
Choose ‘Tools & Settings’
Once you have logged in, click on the ‘Tools & Settings’ option, in the left-hand menu.
STEP 3
Choose ‘Spam Filter’
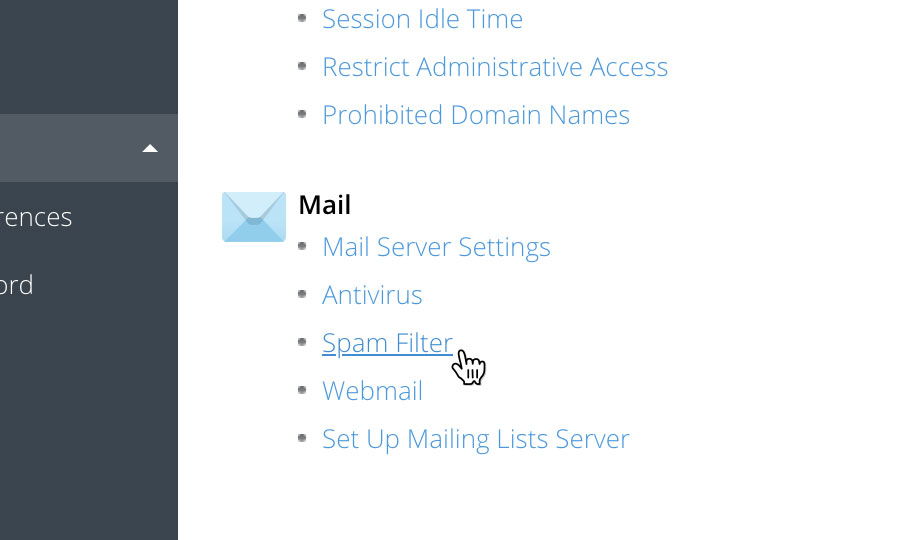
This will bring up a list of categories.
Locate the heading ‘Mail’, then click on the option ‘Spam Filter’.
STEP 4
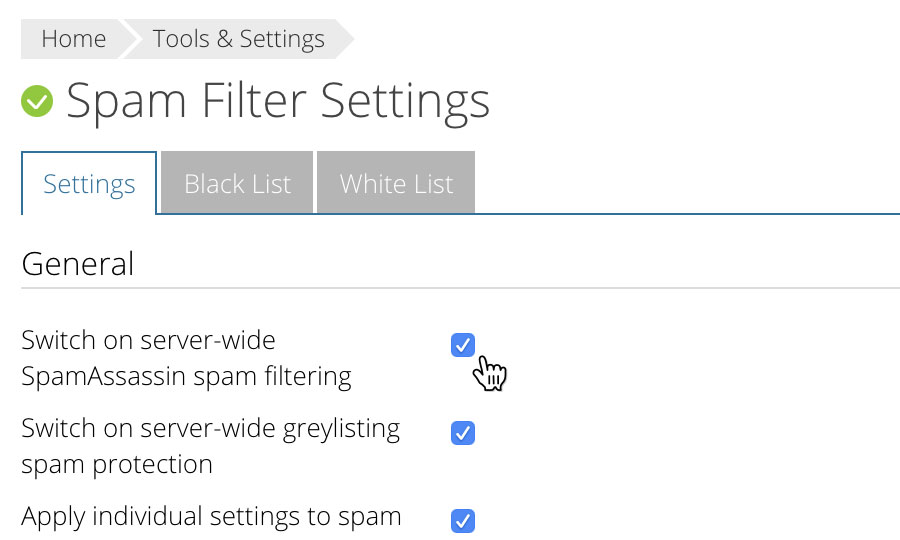
Switch on SpamAssassin
Ensure the checkboxes labelled ‘Switch on server-wide SpamAssassin spam filtering’, ‘Switch on server-wide greylisting spam protection’ and ‘Apply individual settings to spam filtering’ are all checked.
STEP 5
Adjust the spam score
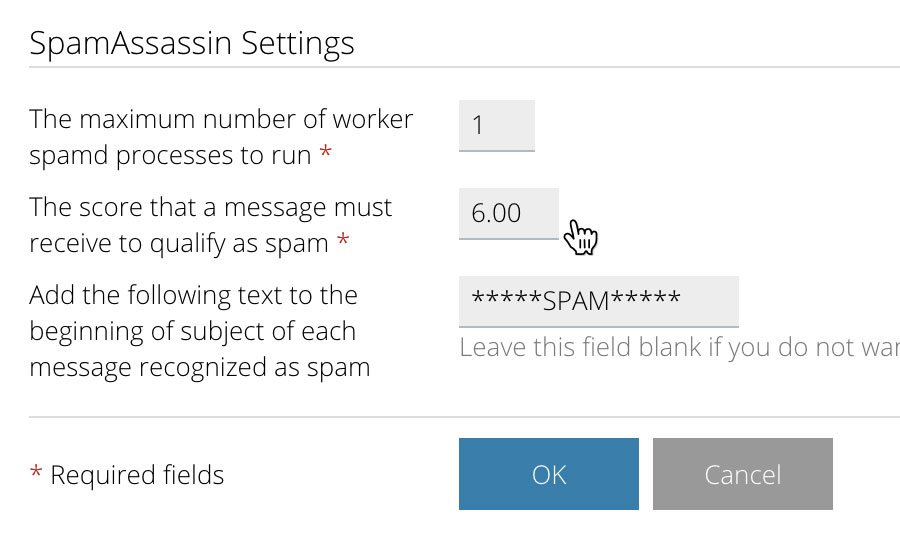
Locate the text field labelled ‘The score that a message must receive to qualify as spam’ and adjust the score as you please.
The default score is ‘7.00’. If you wish to increase your spam filter sensitivity, enter a lower score such as ‘6.00’.
Similarly, if you wish to decrease your spam filter sensitivity, enter a higher number such as ‘8.00’.
STEP 6
Save your changes
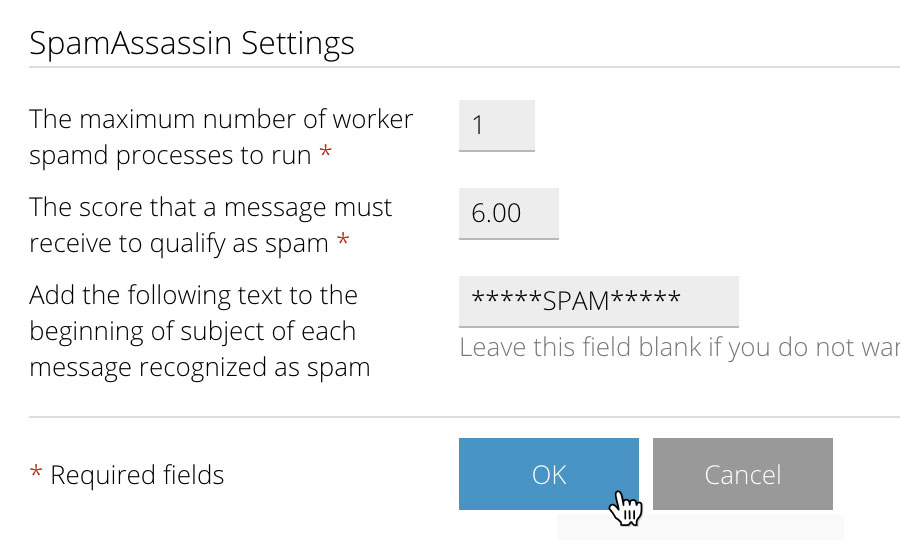
After you have entered your new spam score, click the button labelled ‘OK’ to save your settings.
Adjust spam settings for a specific mailbox
STEP 1
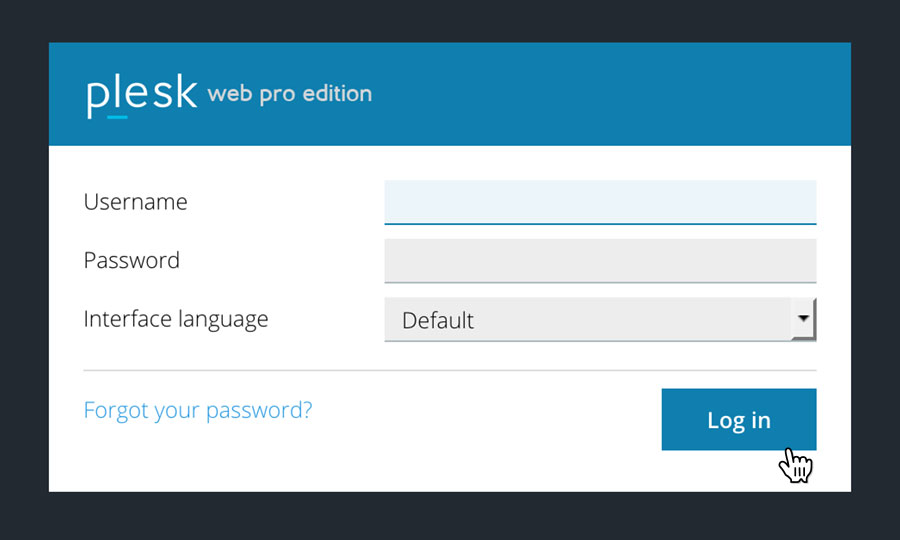
Login to your account
Firstly you’ll need to log in into your Plesk Onyx control panel, which will be at a URL similar to https://your_server_number.xenserve.com:8443/
STEP 2
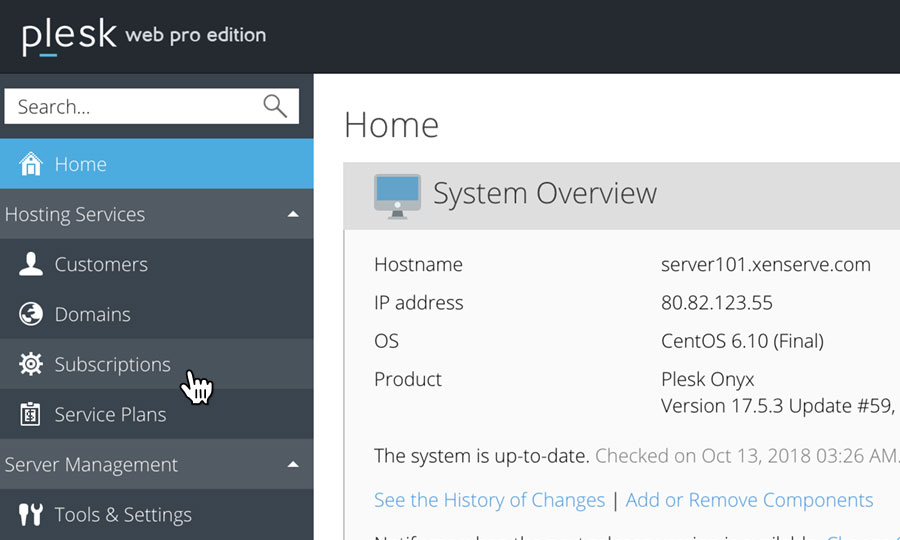
Choose ‘Subscriptions’
Once you have logged in, click on the ‘Subscriptions’ option, in the left-hand menu.
STEP 3
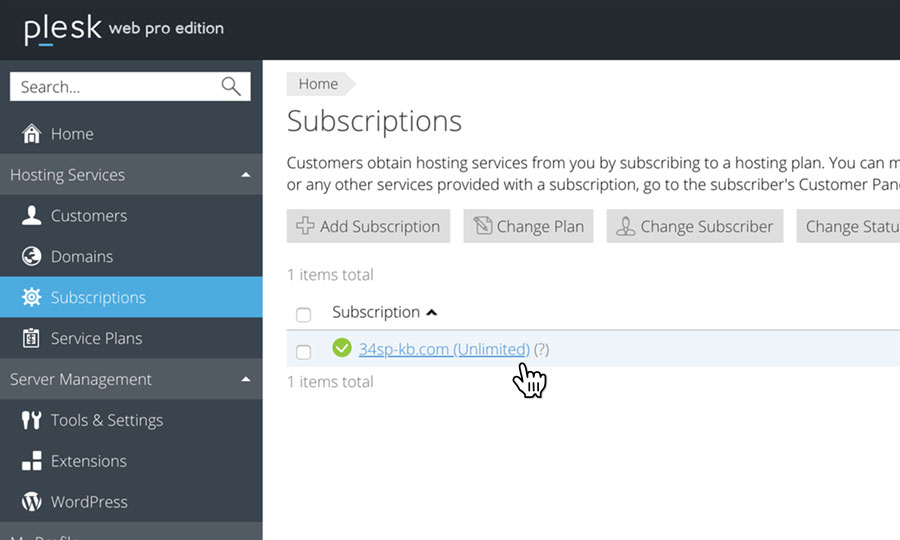
Choose Your Site
This will bring up a list of websites you have on your Reseller Hosting account.
Locate the domain name you wish to access, then simply click on it.
STEP 4
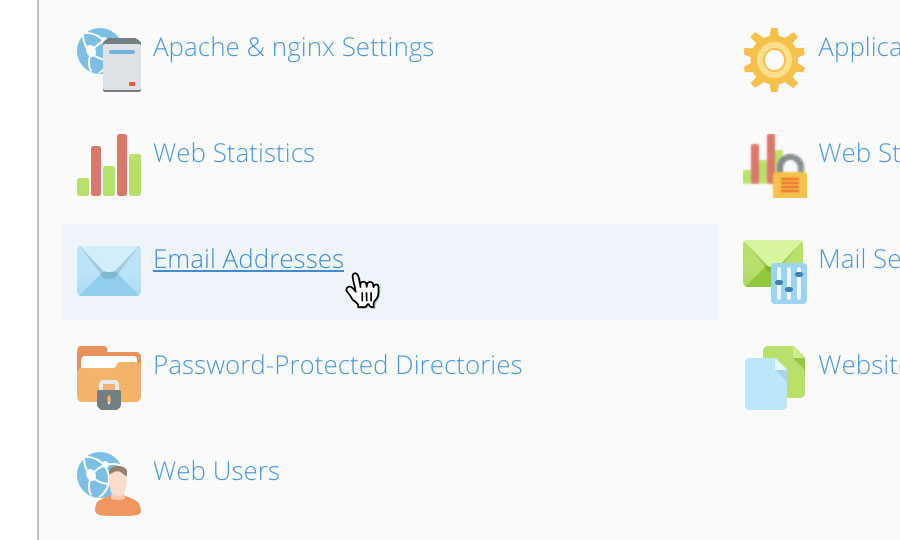
Choose ‘Mail’
This will bring up a an overview of your selected domain. To view a list of email addresses on this domain, simply click on the button labelled ‘Mail’.
STEP 5
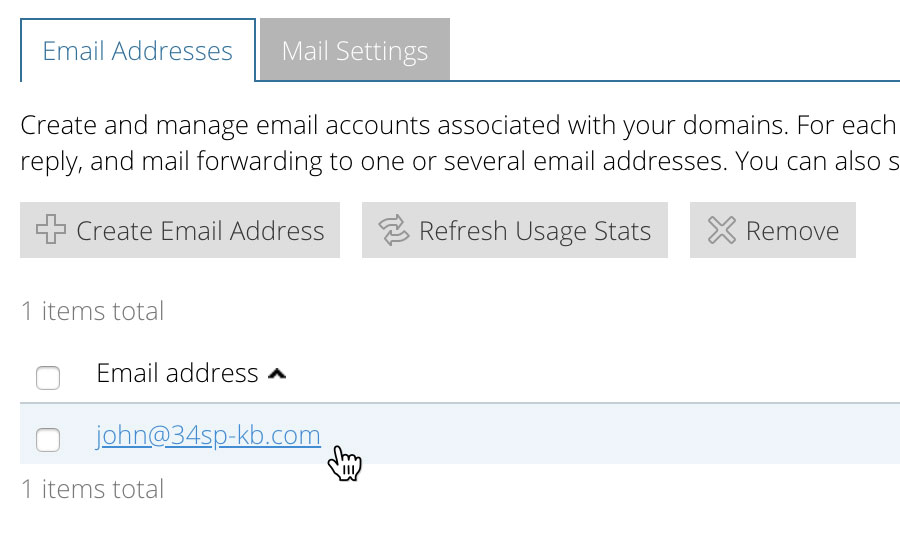
Choose an email address
Click on the the email address you wish to edit, when viewing the ‘Email Addresses’ page.
STEP 6
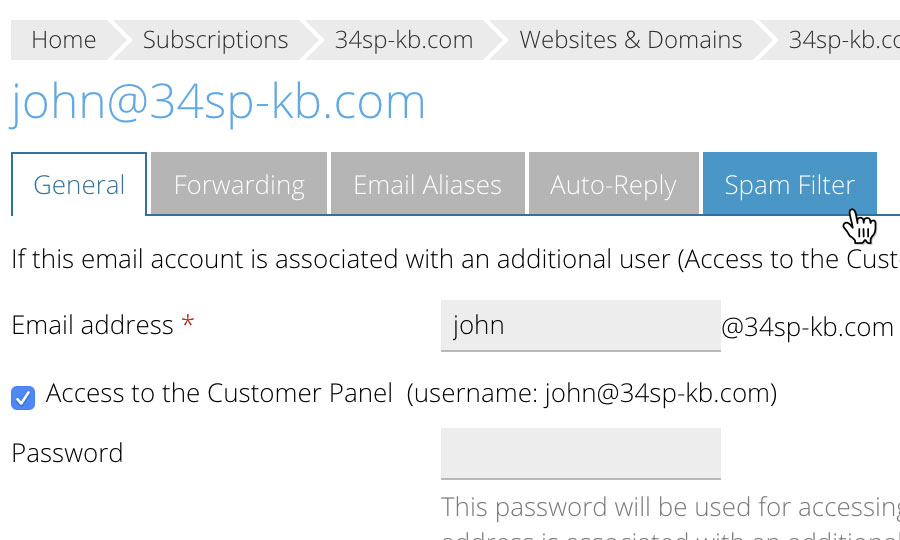
Choose Spam Filter
The simply click on the tab labelled ‘Spam Filter’.
STEP 7
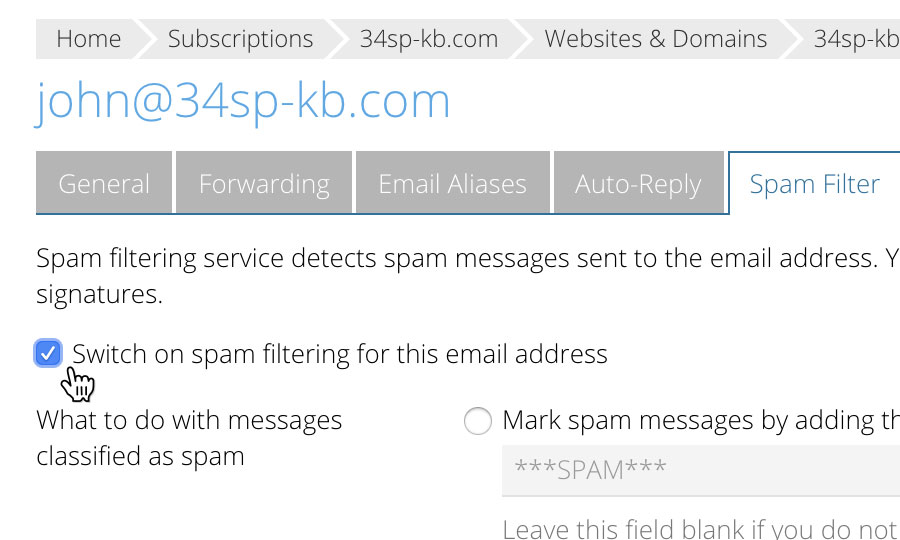
Switch on spam filtering
Click on the checkbox ‘Switch on spam filtering for this email address’. This will mean the local spam settings for this mailbox will be used, instead of your server-wide spam settings.
STEP 8
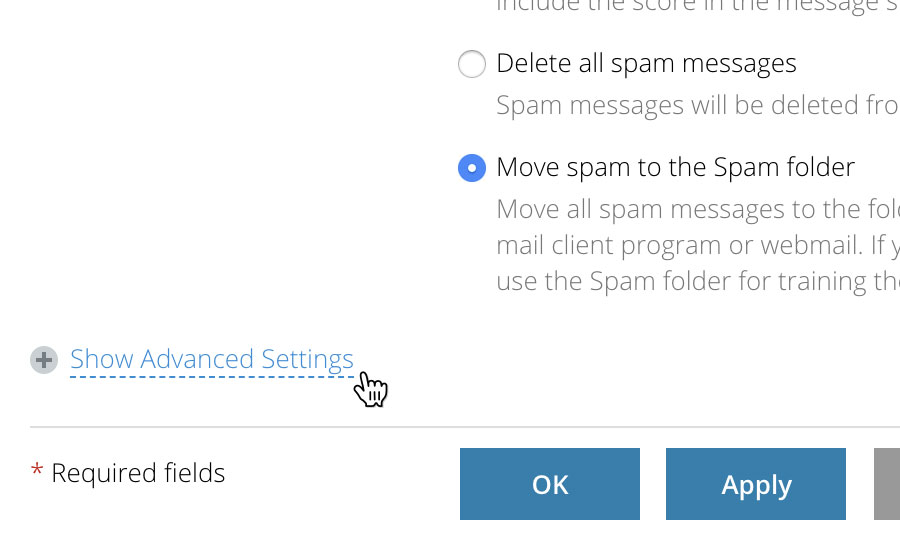
Show Advanced Settings
The click on the link towards the bottom of the form, that reads ‘Show Advanced Settings’.
STEP 9
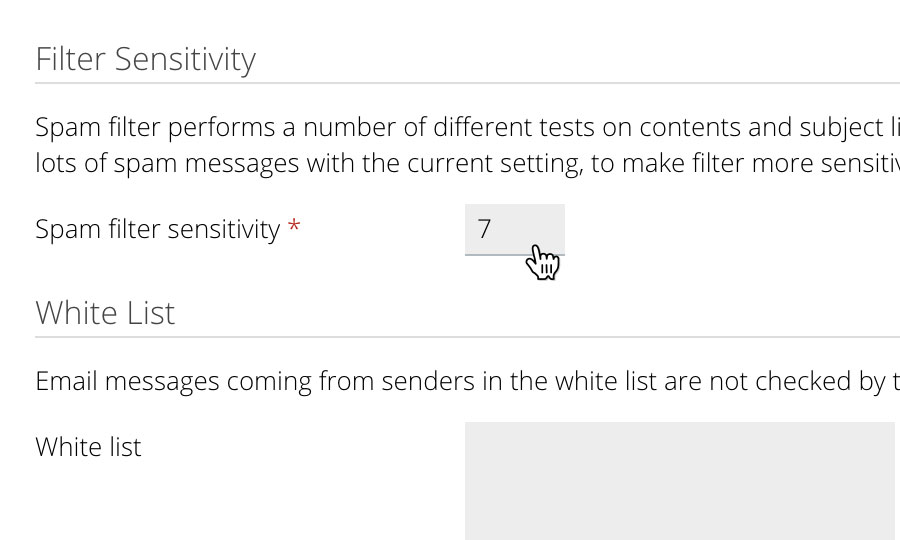
Adjust the spam score
Locate the text field labelled ‘Spam filter sensitivity’ and adjust the score as you please.
The default score is ‘7’. If you wish to increase your spam filter sensitivity, enter a lower score such as ‘6’.
Similarly, if you wish to decrease your spam filter sensitivity, enter a higher number such as ‘8’.
STEP 10
Save your changes
After you have entered your new spam score, click the button labelled ‘OK’ to save your settings.
