Moving Email accounts from one cPanel server to another
It is common practice to change hosting service providers when you are not happy with the service of your present provider. A major deterrent in doing so is the problem of moving email accounts, especially when you have plenty of them stored on the server and you cannot afford to give them away. So, when you move your hosting account from one server to another, the issue that would bother you most is how you can move all emails stored in the old server to the corresponding email accounts on the new server.
If your hosting cpanel provides for taking full backup of your root directory, an easier method would be to download a full backup from the old server and restore it on the new server. This will automatically create all your email accounts on the new server with same passwords and copy all the old email files. This article becomes relevant when you do not have such a facility or for some reason you do not want to do a full backup-restore (not wanting to disturb your website files on the new server).
In this article I will demonstrate how to move emails from one hosting server to another. This is actually quite a simple task if your source and destination accounts are both on cPanel.
Step 1. Create Email accounts on the new server
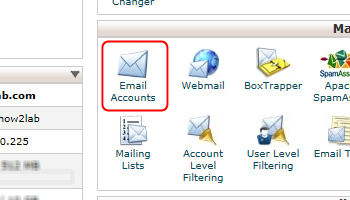
As a first step, create all your email accounts on the new server, as they exist on the old server. This can be done from your cPanel control panel on the new server. To do this, the iconized link you need to click in your new cpanel is – Email Accounts.

Step 2. Download Emails from the old server
Next, connect to your old hosting account via FTP and download all your email related directories and files.
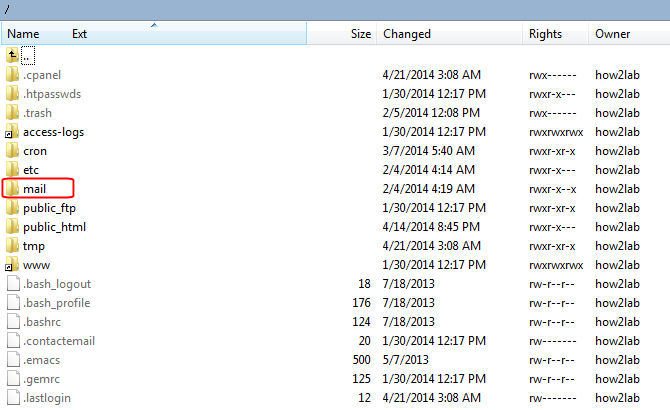
After establishing FTP connection (using any standard ftp client), navigate to the root directory of your hosting account. You will see a directory structure somewhat like shown below.

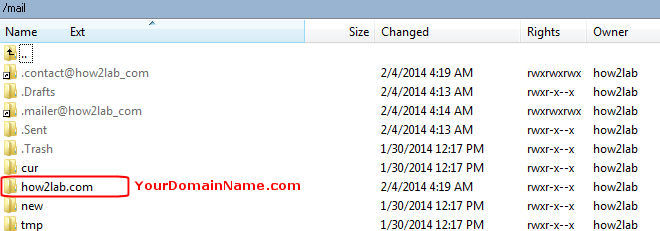
All your emails are under the mail directory. When you drill down to the mail directory, you will see a directory structure somewhat like shown below. You need to download everything under the mail directory.

Just for the sake of understanding …
Drill down to the directory yourdomainname.com. In our example, it is how2lab.com. You will see a directory structure as shown below. Here each listed directory corresponds to an email account that you have on your old server.

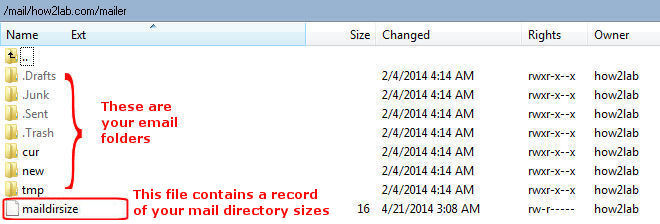
Drill down further to any one of the listed sub-directories. You will see a structure as below. These are your email folders and some or all of them will be containing your email files, which are essentially required to be moved to the new server.

Instead of moving emails directory by directory, it would be much easier to simply download the entire set of directories and folders under mail directory. So, download everything under the mail directory into your local computer.
Step 3: Move Emails to the new server
Now, disconnect from the old server and connect to the new server via FTP. Navigate to the mail directory on the new server. Upload everything that you downloaded from the old mail directory on to the new mail directory. This will copy everything on the new server. If you already had some emails on the new server (in case you decided to move emails from old server after having operated the new one for some time), you do not have to worry. They will remain intact and your old mails will simply get added on to the corresponding directories on the new server.
Once all files are uploaded, you are DONE. You can verify that old mails have indeed moved into your newly created email accounts, by logging into your new email accounts using a webmail interface.
